The Microchip Graphics Composer (MGC) is a RAD tool that enables configuring widgets without writing code to create a User Interface (UI).
Once the UI is done, the project can be exported with the assets and easily deployed on the target.
MGC Installation
At the moment, the MGC is only available for Linux machines.
Download the MGC from the page: https://developerhelp.microchip.com/xwiki/bin/view/software-tools/mgs/linux-ug/
Download the mgc-egt-x86_64.AppImage file.
There is no dependencies to install. The only constraint is that the GLIBC version may be equal to or greater than the one used to generate the AppImage. You can find the version used in the INSTALL.txt file.
Execute the mgc-egt-x86_64.AppImage file. You may need to set the execution permission with
chmod +x mgc-egt-x86_64.AppImage
Overview of the User Interface
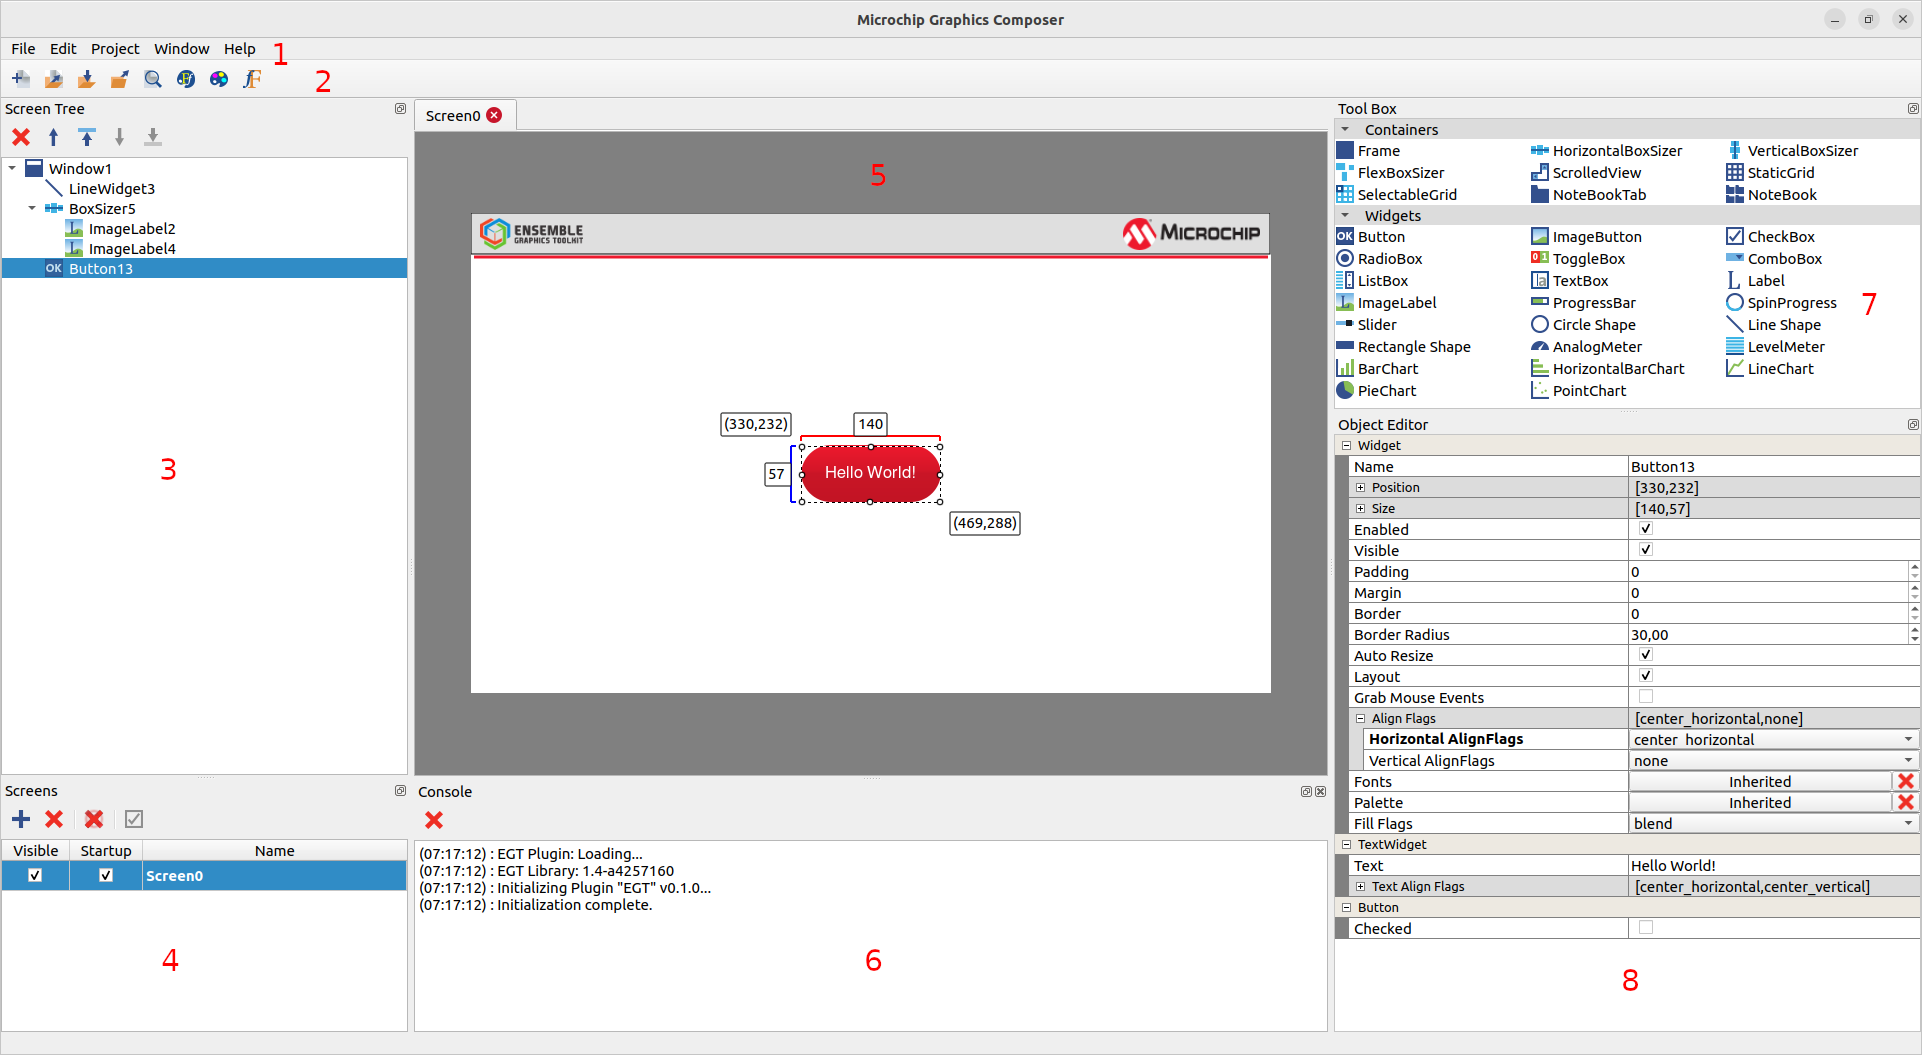
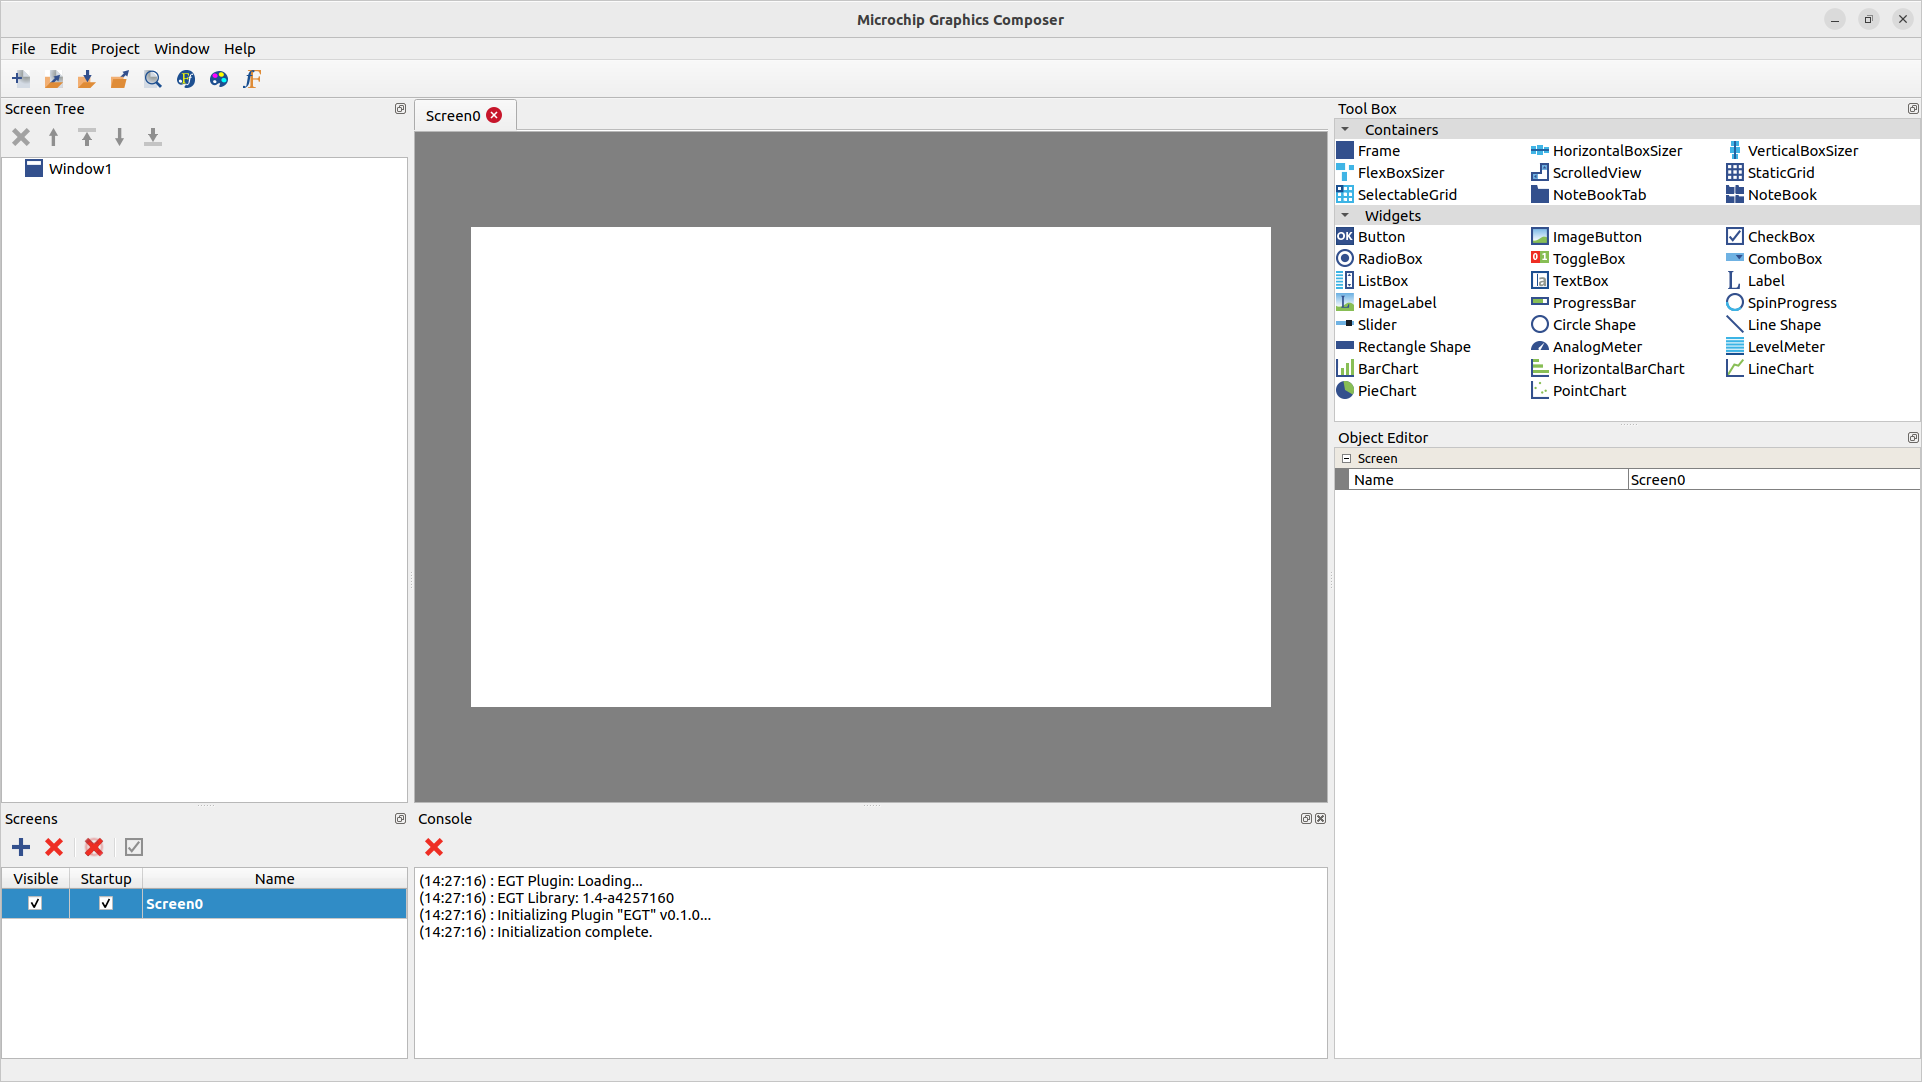
MGC Overview
- Main menu bar. At the top of the workspace are user menus that can be used to perform project tasks and configure the work environment.
- Toolbar bar. Below the main menu is the toolbar. It contains convenience icons that can be clicked to perform commonly used tasks such as create/open/save/export a project, get a preview, and configure themes/palette/font.
- Screen tree pane. At the left is the screen tree pane. It maintains a tree list of current screen items. It can be used to change the z-order of widgets and to move a widget to another container.
- Screens pane. At the bottom left is the screens pane. Each screen is an EGT window. At least, one screen must be created. The visible property shows/hides the screen tab in the screen designer. The startup property shows/hides the window on the target.
- Screen designer. In the middle of the workspace is the screen designer. It contains one or more screens. This is the area where widgets can be placed.
- Console. Below the screen designer is the console that displays information messages, especially the version of the plugin and the EGT library one.
- Tool box pane. At the top right side of the screen designer is the tool box. It contains a gallery of containers and widgets that can be picked and dropped in the screen designer.
- Object editor. At the bottom left is the object editor pane. It displays the properties of the widget selected.
Overview of the Workflow
- Set up the project: configure the screen resolution and the resources paths.
- Design the UI by adding and configuring widgets. The preview allows checking the rendering of the current screen.
- Export the project. A zip file is generated. It consists of the ui.xml file and, optionally of the assets used in the UI.
- Write an EGT application that instantiates the UiLoader class to load the ui.xml file. Code actions.
- Deploy the zip file and the EGT application on the target.
Building an EGT application with the MGC
Set up the Project
- Launch the MGC.
./mgc-egt-x86_64.AppImage
The MGC starts with an empty project.
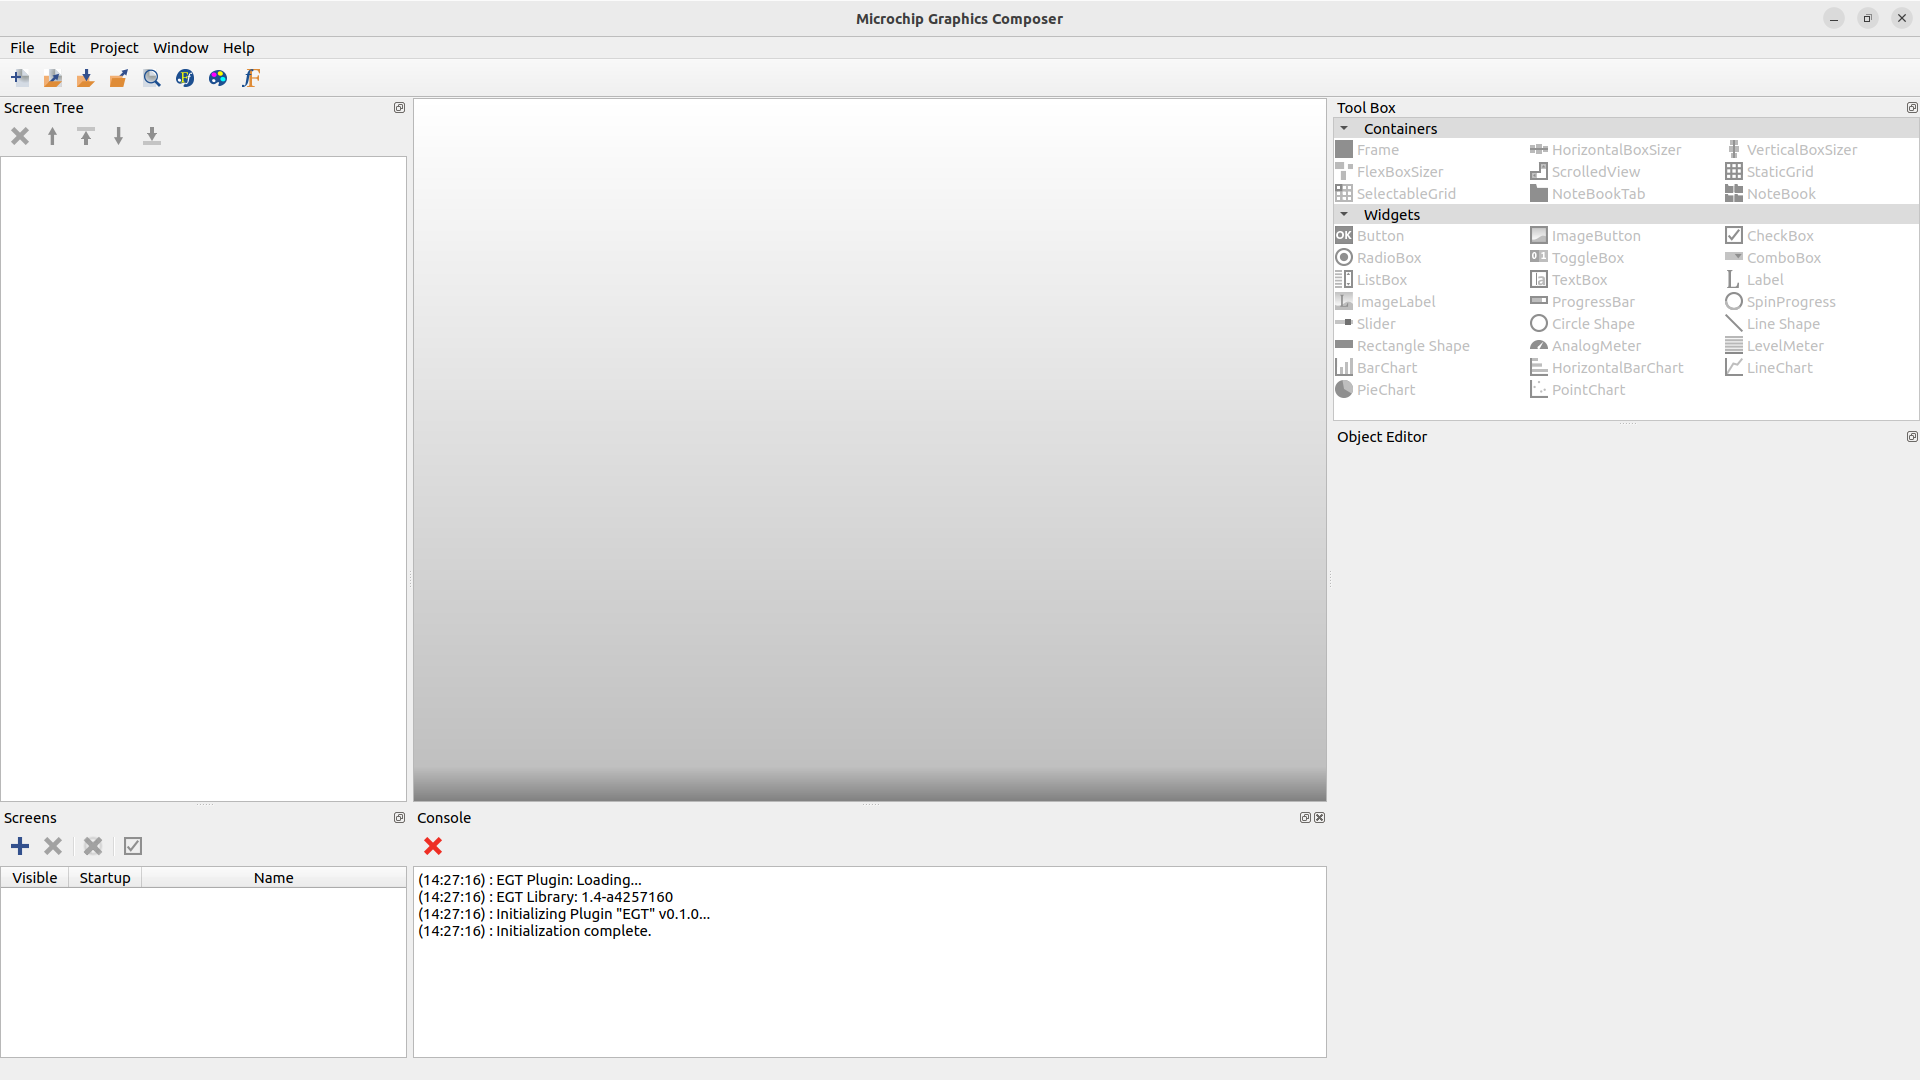
MGC: New Project
- Set up the project.
- Configure the screen size: go to the
Project menu, then Settings, and Screen Size. Set the size to 800x480 pixels.
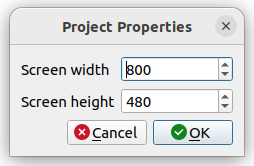
MGC: Project Screen Size
- If assets are going to be used, the MGC needs to know what is the base path. This base path will be removed from the real path of the assets during the export process to generate a relative path. For instance, if the asset is located in
/home/tom/images/my_asset.png and the base path is set to home/tom, the exported path of the asset will be images/my_asset.png. Go to the Project menu, then Settings, and Resources Search Paths. Several paths can be set. When adding assets, it won't be possible to choose files that are not part of the base paths.
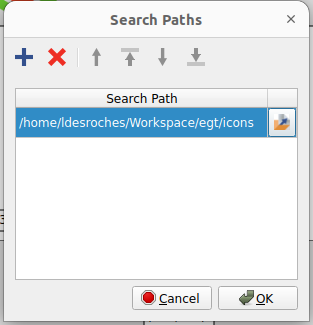
MGC: Project Resources Search Paths
Add a Screen
To be able to start the design of the UI, a screen is needed. Click on  in the bottom-left
 Screens pane.
A new screen is added to the screen designer pane.
MGC: New Screen
The Visible checkbox displays or hides the screen from the screen designer. The Startup checkbox is used during the export process to decide which screen will be set as visible on the target.
Add Widgets
Let's add some widgets to the application. Drag and drop one HorizontalBoxSizer, one VerticalBoxSizer, one ImageLabel, two Labels, and one Button from the tool box pane to the screen designer.
MGC: Adding Widgets
The screen tree pane is updated as well, all the widgets added are children of the window widget.
Configure Widgets
- Configure the HorizontalBoxSizer.
- Click on the HorizontalBoxSizer from the screen designer or the screen tree. The object editor pane displays the properties of the widget selected.
- Click on the cross button of the
Align Flags property to expand the group. For the Horizontal AlignFlags property, select expand_horizontal. For the Vertical AlignFlags property, select top.
- Set the
padding property to 5.
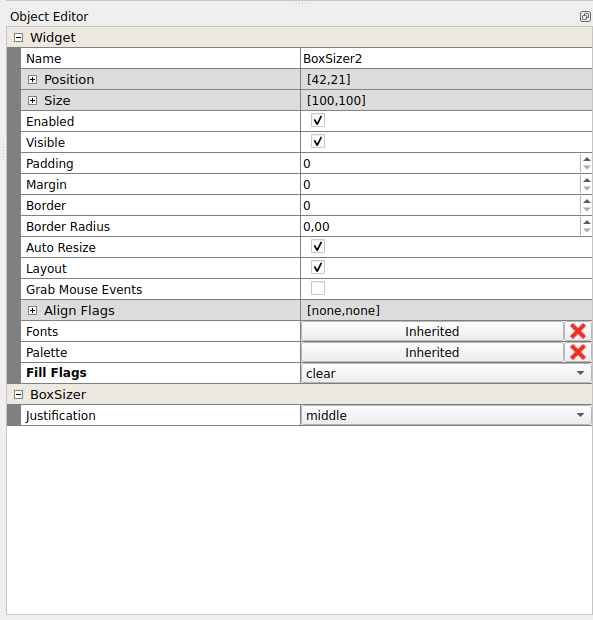
MGC: Object Editor
- Configure the VerticalBoxSizer.
- Set the
Horizontal AlignFlags property to expand_horizontal. For the Vertical AlignFlags property, select bottom.
- Configure the ImageLabel.
- Select the ImageLabel and unselect
Show Label.
- Click on the
URI property to open a file dialog to select the image. Navigation is limited to the resources search paths. Select an image (the one used here is egt_logo_icon.png 128px).
- Configure the Labels.
- Select the first Label and set the
text property to HelloWorld, press the Enter key to validate.
- Let's set a custom font for this widget, click on the
Inherited button from the Fonts property. Set the Size to 24.
- Select the second Label and set
Text to Loading....
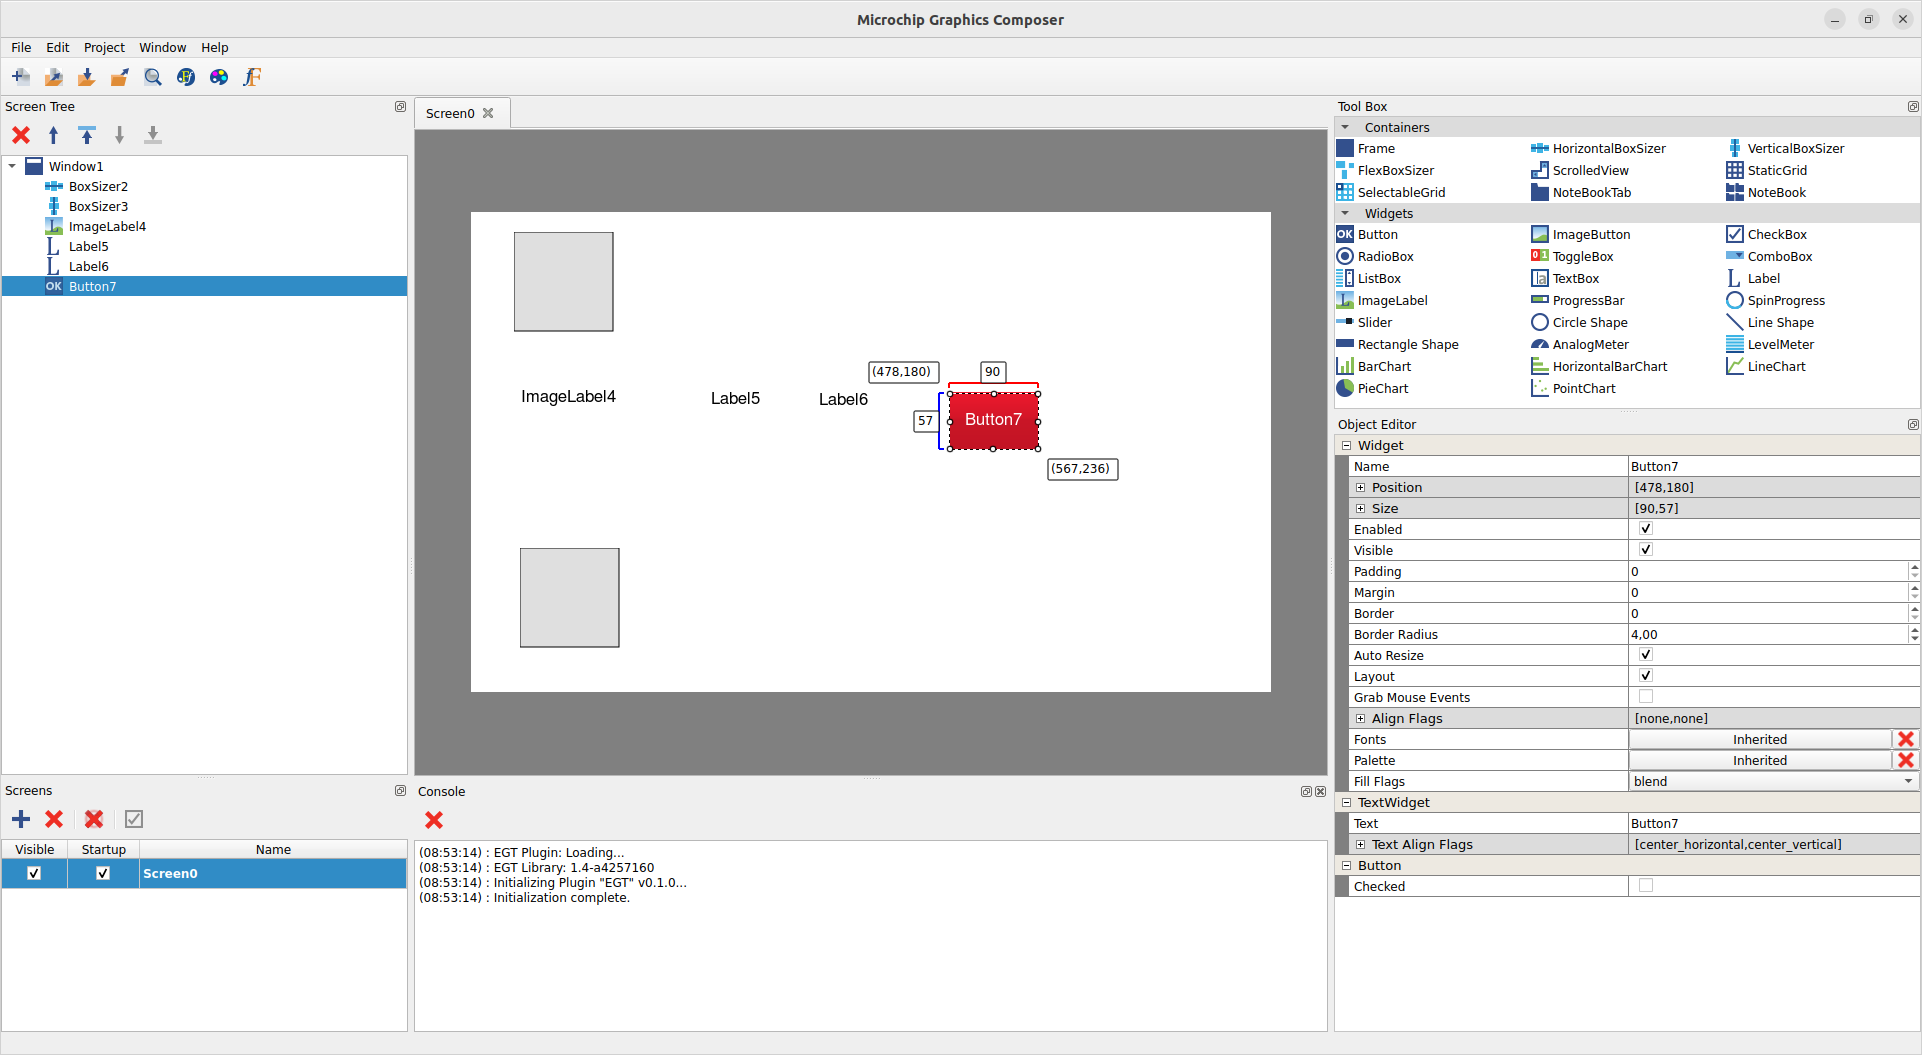
- Configure the Button.
- Select the Button and set
Text to Start.
- Let's change the color of the button. Click on the
Inherited button of the Palette property. In the normal state column, click on button_bg and choose the color you want.

MGC: UI
- Position the widgets.
- Let's move the logo and
HelloWorld label to the HorizontalBoxSizer. Click on the logo, press the Ctrl key and drag&drop it to the HorizontalBoxSizer.
- Do the same with HelloWorld. Notice that the screen tree pane is updated to reflect the new parent of these two widgets.
- Let's move the button and the remaining label to the VerticalBoxSizer. This time, use the screen tree pane to do it. Select the button and drag&drop into the VerticalBoxSizer. Do the same for the Label.
- Select the Loading... Label and uncheck the
Visible property.
The UI looks like this:
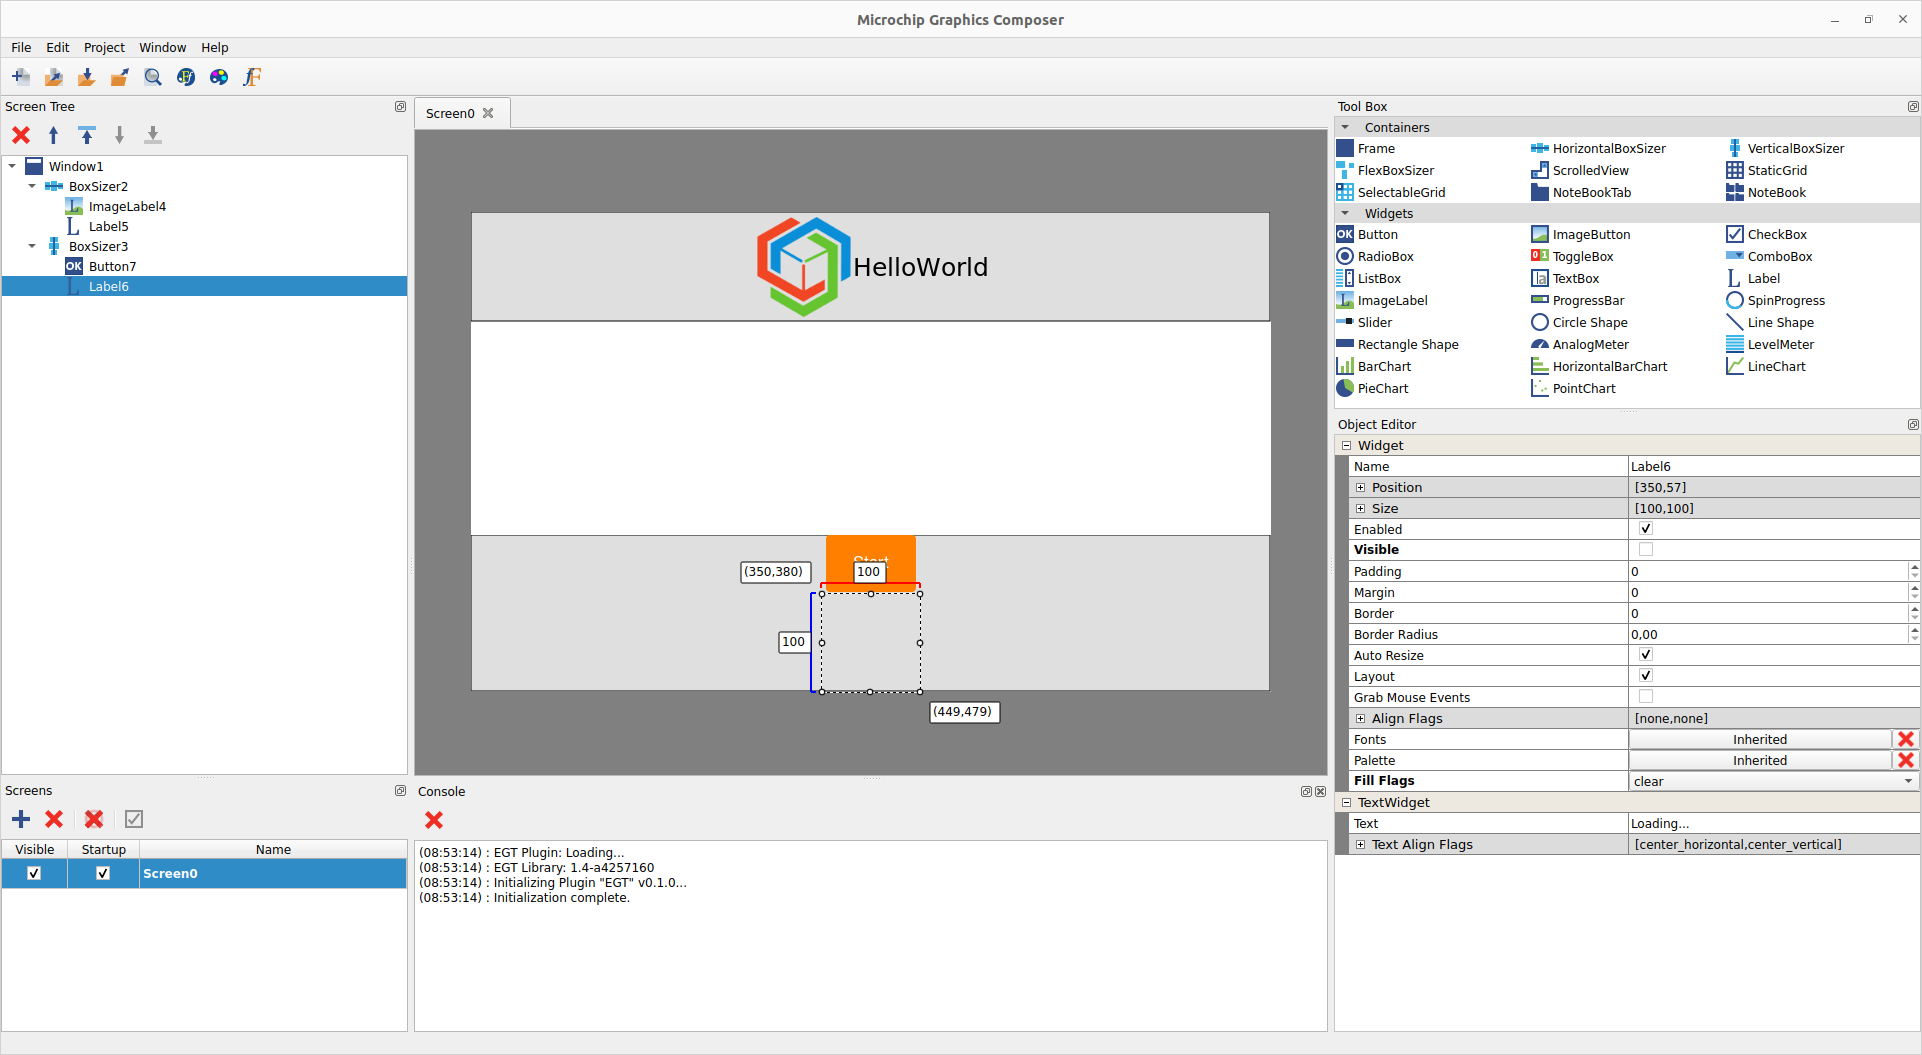
MGC: UI
- Check the UI with the preview.
The preview displays the current screen as it will be rendered by an EGT application. In the toolbar, click on  to get it.
Export and Save the Project
The project can be exported by clicking on  in the toolbar. Select the path by clicking on
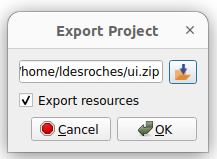
MGC: Export Project
If assets don't need to be exported, the Export resources checkbox can be unchecked.
The project can be saved to be modified later. Click on in the toolbar.
Create the EGT Application
The UI part is done. Now, it's time to create the EGT application that will load this UI.
#include <egt/ui>
#include <egt/uiloader.h>
int main(int argc, char** argv)
{
egt::experimental::UiLoader loader;
auto window = loader.load("file:ui.xml");
window->show();
return app.run();
}
Application definition.
Definition app.h:49
Let's display the Loading... label when we click on the Start button. These widgets have to be retrieved from the XML file to be able to use them in the code.
#include <memory>
#include <egt/ui>
#include <egt/uiloader.h>
int main(int argc, char** argv)
{
egt::experimental::UiLoader loader;
auto window = std::static_pointer_cast<egt::Window>(loader.load("file:ui.xml"));
auto label = window->find_child<
egt::Label>(
"Label6");
auto button = window->find_child<
egt::Button>(
"Button7");
{
label->visible(true);
});
return app.run();
}
A Label that displays text.
Definition label.h:41
A single event that has information about the event and state for the event.
Definition event.h:255
Compile this program. Copy and unzip the ui.zip file at the same location as the program.
ls
128px app app.cpp ui.xml ui.zip
Run the application and click on the button.
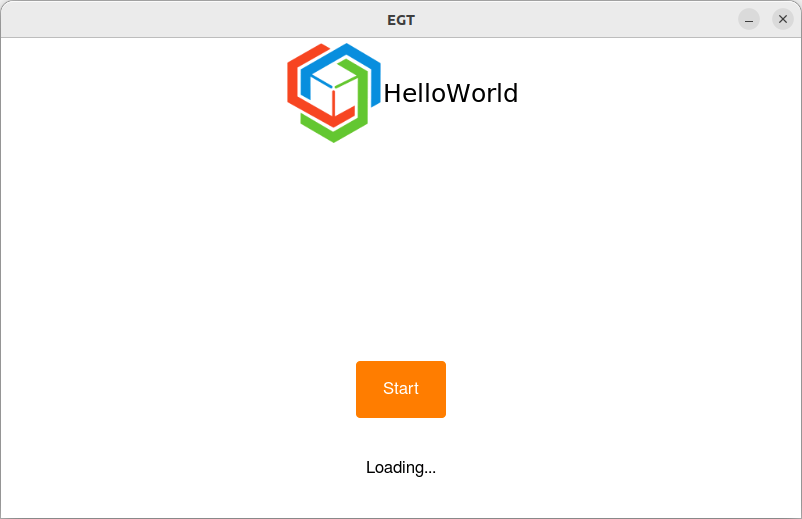
MGC: Application